Overview
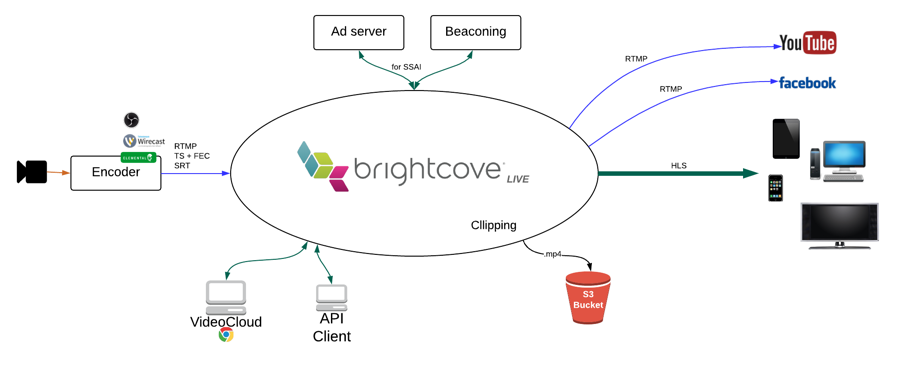
This tutorial explains at the API level how to create a live streaming job in Brightcove live and then create RTMP outputs and re-stream them to YouTube Live and Facebook Live.
This tutorial will use curl to make the API requests, but you can easily make them in Insomnia, Postman or other REST clients instead.
Create a live job
First, we will create a live job. You will need an API-KEY for the Live API. If you do not, and are interested in obtaining access, please contact your account manager.
-
Copy and paste the following curl command into a text editor:
curl -X POST \ https://api.bcovlive.io/v1/jobs \ -H 'Content-Type: application/json' \ -H 'x-api-key: ' \ -d '{ "live_stream": true, "region": "", "outputs": [{ "label": "hls360p", "live_stream": true, "height": 360, "video_bitrate": 365, "segment_seconds": 6, "keyframe_interval": 60 }, { "label": "hls432p", "live_stream": true, "height": 432, "video_bitrate": 730, "segment_seconds": 6, "keyframe_interval": 60 }, { "label": "hls540p", "live_stream": true, "height": 540, "video_bitrate": 2000, "segment_seconds": 6, "keyframe_interval": 60 }, { "label": "hls720p3M", "live_stream": true, "height": 540, "video_bitrate": 2000, "segment_seconds": 6, "keyframe_interval": 60 }, { "label": "hls720p4.5M", "live_stream": true, "height": 540, "video_bitrate": 4500, "segment_seconds": 6, "keyframe_interval": 60 }] }' -
Replace:
with the closest available region to your encoder, see closest available regions to your encoder. For instance:us-west-2with your Brightcove live API key. For example:abcdfeg-this-is-a-fake-api-key-FgJajjasd12hJHsZ
- After making those changes, copy and paste the code into Terminal or whatever command-line app you use and run it.
-
The response should be something like this:
{
    "id": "3b6871bf2f344acaa6b397d09b476018",
    "outputs": [... removed for simplicity ...],
    "stream_url": "rtmp://ep1-usw2.bcovlive.io:1935/3b6871bf2f344acaa6b397d09b476018",
    "stream_name": "alive",
    "static": false,
    "encryption": {},
    "playback_url": "https://bcovlive-a.akamaihd.net/3b6871bf2f344acaa6b397d09b476018/us-west-2/NA/playlist.m3u8",
    "playback_url_dvr": "https://bcovlive-a.akamaihd.net/3b6871bf2f344acaa6b397d09b476018/us-west-2/NA/playlist_dvr.m3u8"
}
This jobs will create 5 renditions based on Apple recommendations.
Configure your encoder
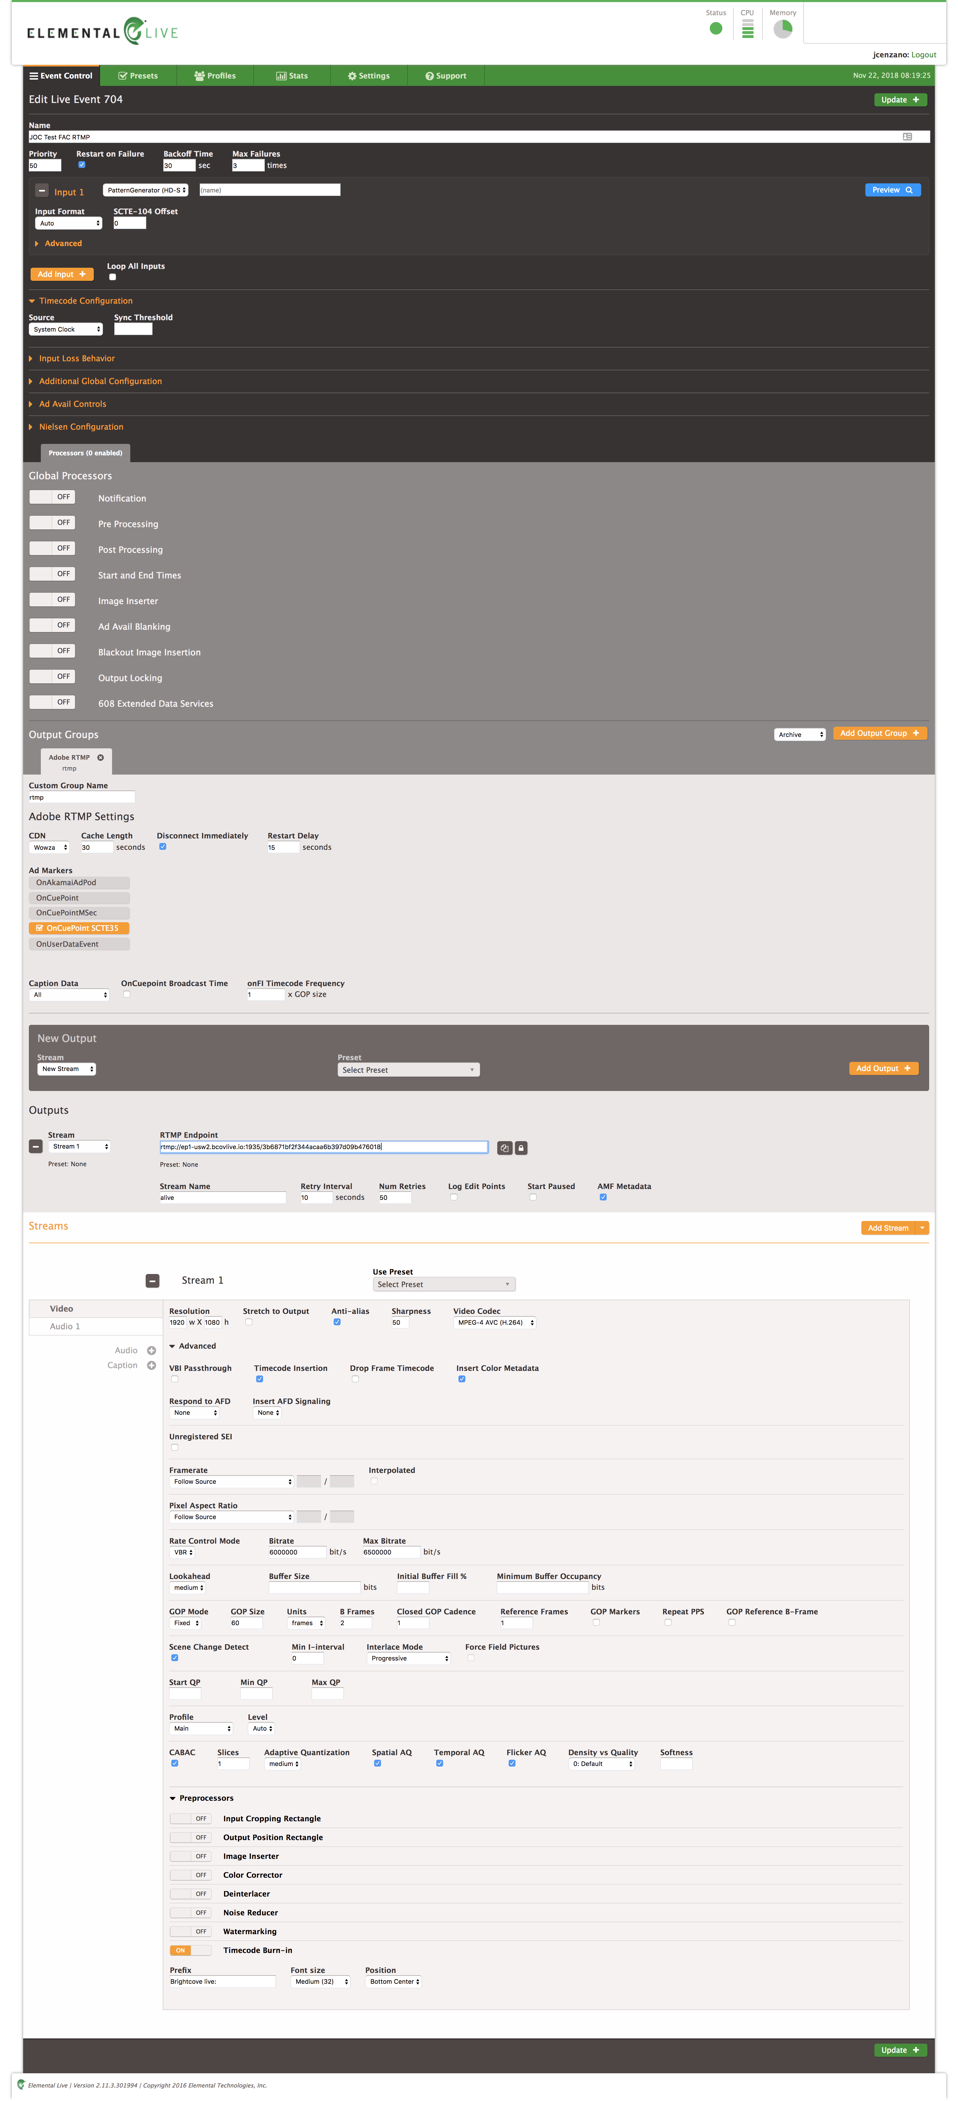
The steps shown here will assume an Elemental live box encoder, which was used in testing the steps for this tutorial. If you have a different encoder, the settings should be similar.
The most important settings for this case are:
- Configure timecode source as "system clock"
- Set "OnFi timecode frequency" to 1
- Check "time code insertion" inside video
- Strongly recommended: Framerate = follow source
This is the config we used for this experiment:
Test playback
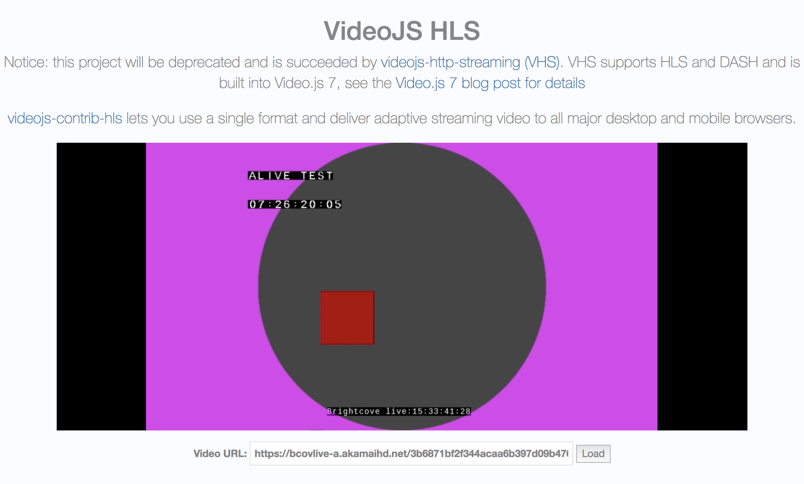
You can use this VideoJS HLS demo page to test playback, just paste the value playback_url returned in the creation job response:
Add the live stream to YouTube live
We are assuming here that you have a YouTube account enabled for live streaming.
-
Click go live, and you should see:

YouTube go live -
Click on "Encoder live streaming":
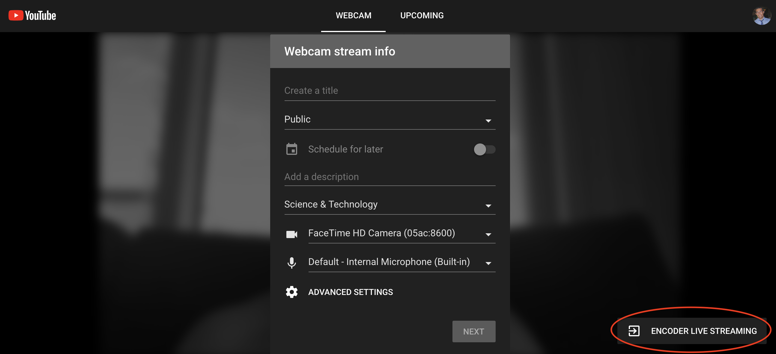
YouTube encoder live source -
Configure your live event YouTube metadata and use the "Encoder set up" data to connect the Brightcove live stream to YouTube:
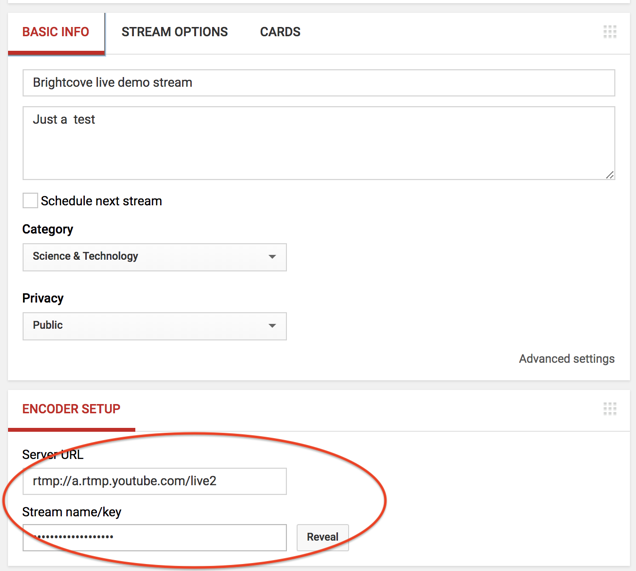
YouTube encoder setup -
Now that we have YouTube live set up, we will create the RTMP output for it from our Live job.
-
Copy the curl command below into a text editor:
curl -X POST \ https://api.bcovlive.io/v1/jobs//rtmpouts \ -H 'Content-Type: application/json' \ -H 'x-api-key: ' \ -d '{ "url": "rtmp://a.rtmp.youtube.com/live2/" }' -
Replace:
with your Brightcove live job id. In our example this value would be3b6871bf2f344acaa6b397d09b476018- your value, from the response to your request to create the live job , will be different.for your Brightcove live API key. For instance:abcdfeg-this-is-a-fake-api-key-FgJajjasd12hJHsZfor the stream name / key that YouTube provides
- Paste the edited code into your command-line app and run it.
-
The response should be something like this:
{ "connection_info": { "host": "a.rtmp.youtube.com", "port": 1935, "application": "live2", "streamName": "" }, "duration_history": [], "rtmp_out_id": "27aacdfa5bcf4436ade0519e6a748aba", "stream_start": 1542902218238 } -
To test YouTube playback you can go to YouTube my channel:
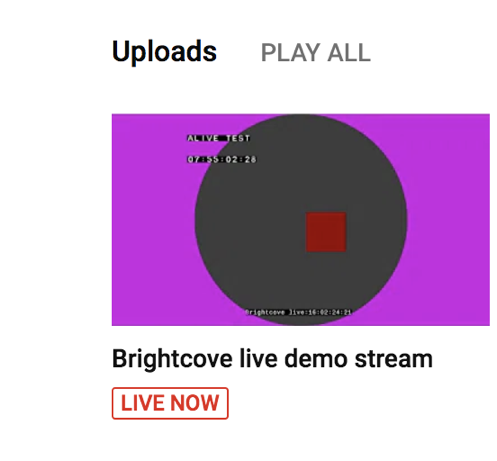
YouTube my channel playback
Add the live stream to Facebook live
We are assuming here that you have a Facebook account enabled for live streaming.
-
Click Live video
-
Click connect and stream key to get the data needed to connect your Brightcove live job:
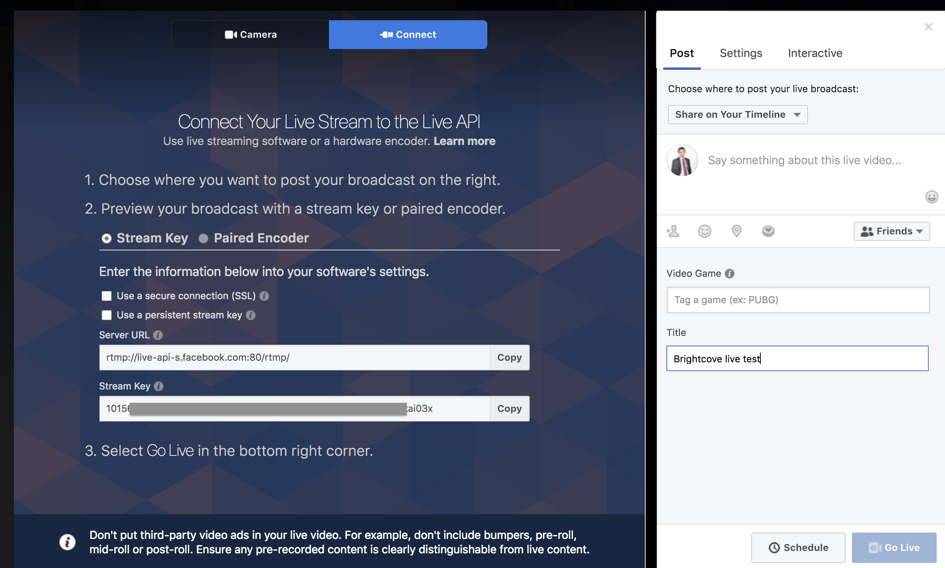
Facebook live config -
Next, create live output for Brightcove live job using "server url" and "stream key" from Facebook. Copy the curl command below and paste it into a text editor:
curl -X POST \ https://api.bcovlive.io/v1/jobs//rtmpouts \ -H 'Content-Type: application/json' \ -H 'x-api-key: ' \ -d '{ "url": "rtmp://live-api-s.facebook.com:80/rtmp/" }' -
Replace:
with your Brightcove live job id. In our example this value would be3b6871bf2f344acaa6b397d09b476018- your value, from the response to your request to create the live job , will be different.with your Brightcove live API key. For instance:abcdfeg-this-is-a-fake-api-key-FgJajjasd12hJHsZwith you stream name that Facebook gives you
-
The response should be something like this:
{ "connection_info": { "host": "live-api-s.facebook.com", "port": 80, "application": "rtmp", "streamName": "" }, "duration_history": [], "rtmp_out_id": "59323c3d1e2b44748755853193fb126c", "stream_start": 1542904101097 } -
To test your Facebook Live stream, click "Go Live" on your Facebook webpage.
