Implementing Player Enhancements for NextGen Live SSAI
Introduction
The Brightcove Player SSAI plugin for NextGen Live provides enhanced server-side ad insertion capabilities with improved user experience features. This plugin offers several key enhancements over the previous Live SSAI implementation:
- Ad overlays: Display time remaining on ads during ad breaks
- PAL integration: Google Publisher Advertiser Identity Reconciliation (PAL) support with nonce generation
- Open Measurement integration: Ad verification through pre-existing OM flow
- Simplified configuration: No additional ad configuration required - everything is now configured on the player
After completing this guide, you should be able to:
- Create a Brightcove Player with the SSAI plugin for NextGen Live
- Configure the plugin options for optimal ad experience
- Create embeds for SSAI-enabled NextGen Live streams
- Understand the key differences from the previous Live SSAI implementation
Audience
Developers and content creators who need to implement enhanced SSAI functionality with NextGen Live streams using the Brightcove Player.
Prerequisites
- An account with NextGen Live access and SSAI enabled
- Access to Brightcove Studio for player management
- A valid ad configuration set up in your account
- Understanding of Brightcove Player configuration
Workflow
To implement the NextGen Live SSAI Player Plugin, follow these steps:
Creating a Player with SSAI Plugin
To use the NextGen Live SSAI functionality, you must create a player with the specific version and SSAI plugin configuration.
Using the Players Module
- Navigate to the Players module in Studio.
- Click .
- Enter a Name for your player.
- Make sure to set the Player Version to
7.38.4or higher. - Navigate to the Plugins section and add the following JSON block to include the SSAI plugin:
"plugins": [ { "name": "ssai", "is_packaged": true, "options": { "trackingBeacons": false, "googlePal": true, "hideOverlays": false } } ] - Configure the plugin options as needed (see Configure Plugin Options section for details).
- Click and then the player.
Configure Plugin Options
The SSAI plugin for NextGen Live supports several configuration options to customize the ad experience:
| Option | Type | Default | Description |
|---|---|---|---|
trackingBeacons |
Boolean | false |
Enable or disable tracking beacons for ad events |
googlePal |
Boolean | true |
Enable Google Publisher Advertiser Identity Reconciliation (PAL) integration. Generation of givn nonce which is passed to backend to be used on ad requests |
hideOverlays |
Boolean | false |
Hide ad overlays that show time remaining during ad breaks. Set to true to disable overlay display |
Sample Plugin Configuration
    {
      "name": "ssai",
      "is_packaged": true,
      "options": {
        "trackingBeacons": false,
        "googlePal": true,
        "hideOverlays": false
      }
    }
Creating an Embed for SSAI-Enabled Streams
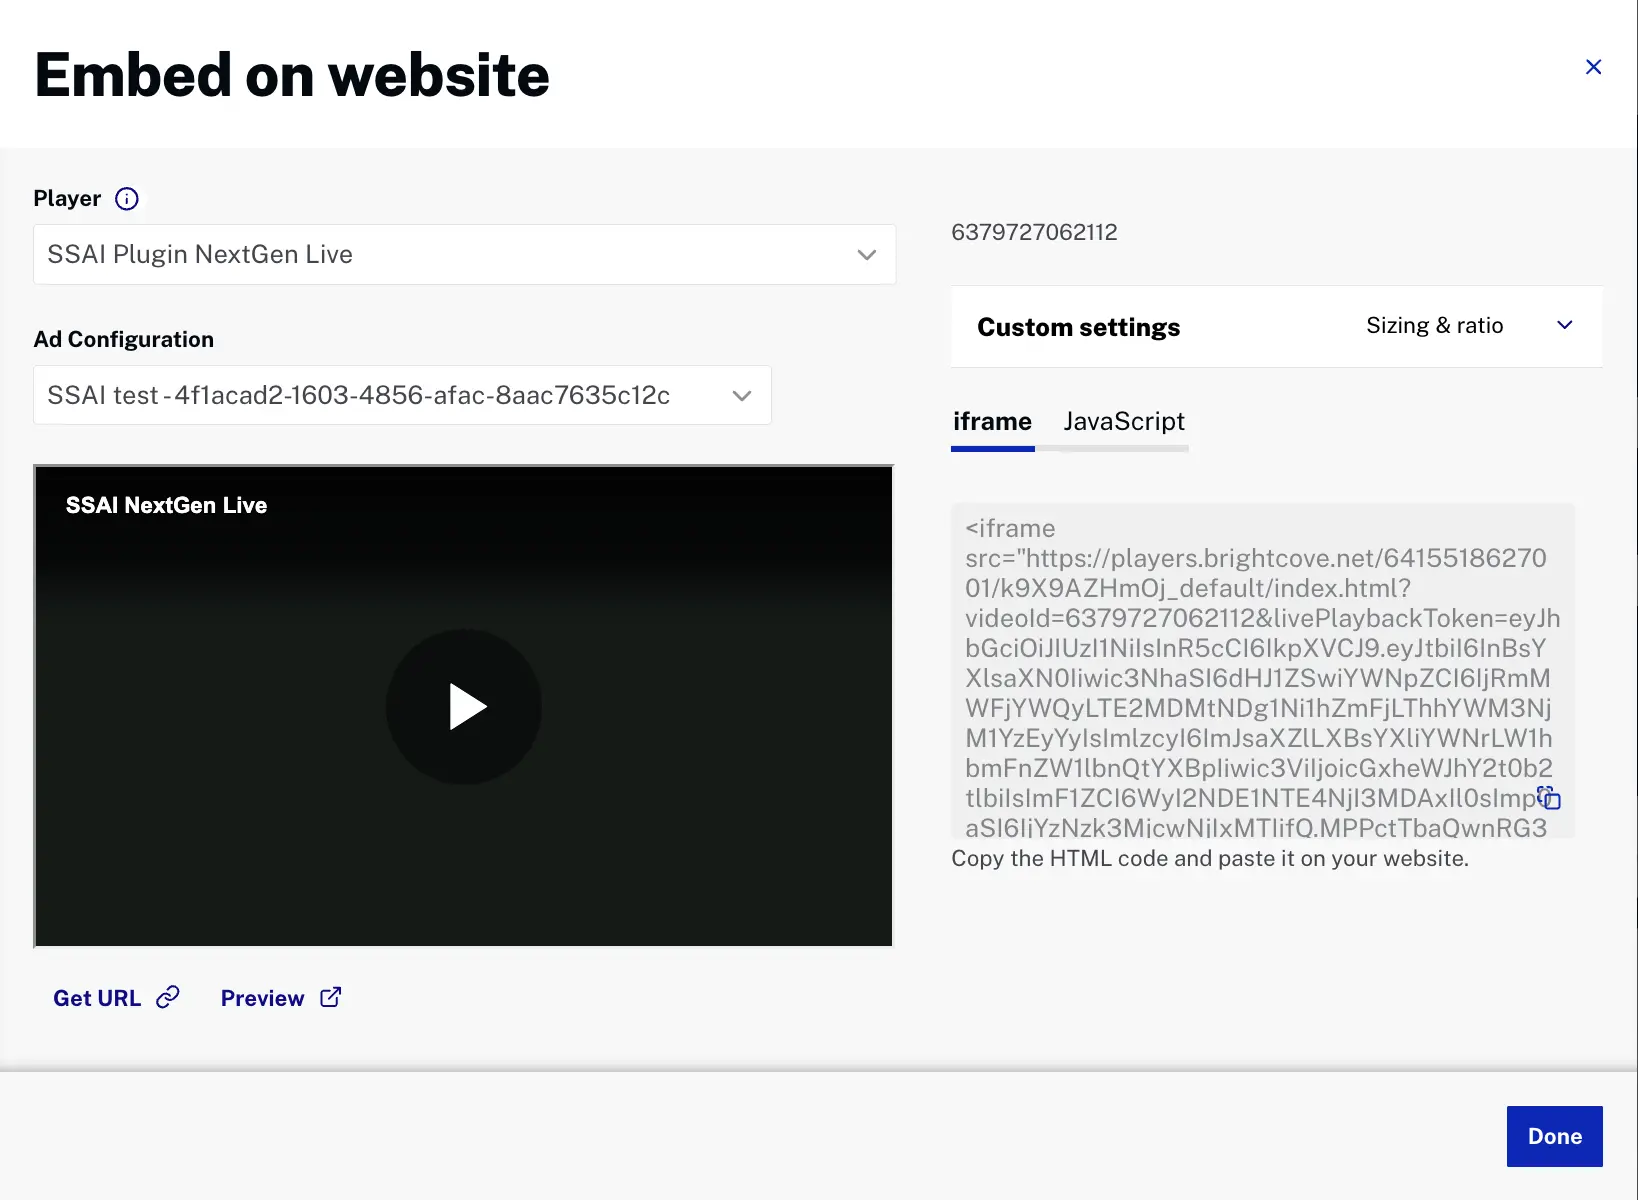
Once your player is configured with the SSAI plugin, creating an embed for NextGen Live SSAI streams is straightforward using Studio.
- Navigate to the Live module in Studio.
- Select your SSAI-enabled NextGen Live channel.
- In the Control Room, click .
- Select your newly created player from the Available Player dropdown.

- Select the appropriate Ad Configuration from the dropdown.
- Copy the embed code for use in your website or application.
Key Differences from Previous Live SSAI
The NextGen Live SSAI Player Plugin introduces several important changes from the previous Live SSAI implementation:
Simplified Configuration
- No additional ad config setup: All ad configurations are enabled by default for NextGen Live
- Player-level configuration: All enhancement options are now configured on the player plugin rather than split between player and ad config
Details previously configured on the player and the ad config are now only available on the player. These options included:
    "client_options": {
      "show_ad_break_remaining_time": true / false,
      "show_ad_remaining_time": true / false,
      "show_number_of_remaining_ads": true / false,
      "client_only_tracking": true / false
    }
Testing Your Implementation
After setting up your NextGen Live SSAI Player Plugin, follow these steps to test your implementation:
- Start your NextGen Live stream with SSAI enabled.
- Load your player using the embed code or URL.
- Insert a test ad break using the Control Room or SCTE-35 signaling.
- Verify ad overlays are displaying correctly (if
hideOverlaysisfalse). - Check PAL integration by monitoring network requests for nonce generation (if
googlePalistrue). - Test tracking beacons if enabled to ensure proper ad event reporting.
