Step-by-Step: Using the Live Module with Open Broadcaster Software (OBS)
To learn about all of the features and functionality available in the Live module, see Quick Start from Legacy Live to NextGen Live. For a series of best practices and recommendations to help ensure a high quality, stable live streaming experience, see Brightcove NextGen Live: Best Practices. For a list of all the options available from Brightcove for delivering live streaming video, see Delivering Live Streams.
After completing this Quick Start, you should be able to:
- Use the Live module to create a live channel
- Configure your encoder for a live channel
- Trim your live channel and save it as a VOD asset in your account
This Quick Start will help you broadcast a live channel to different devices using Open Broadcaster Software (OBS) Studio. OBS is open source software for video recording and live streaming, and can be downloaded here. Other encoders can also be used with the Live module.
Audience
Any publisher who needs to broadcast a live streaming channel using the Live module.
Prerequisites
- An Enterprise account with access to the Live module
- A camera to broadcast the channel
- You must have your own encoding software; this Quick Start uses OBS Studio, which can be downloaded for free
Limitations
- Your encoder must output an RTMP, RTP, or SRT stream.
- Live broadcasts will experience a 20-30 second delay.
- Streaming must begin within 30 minutes of the channel start (default-level account setting).
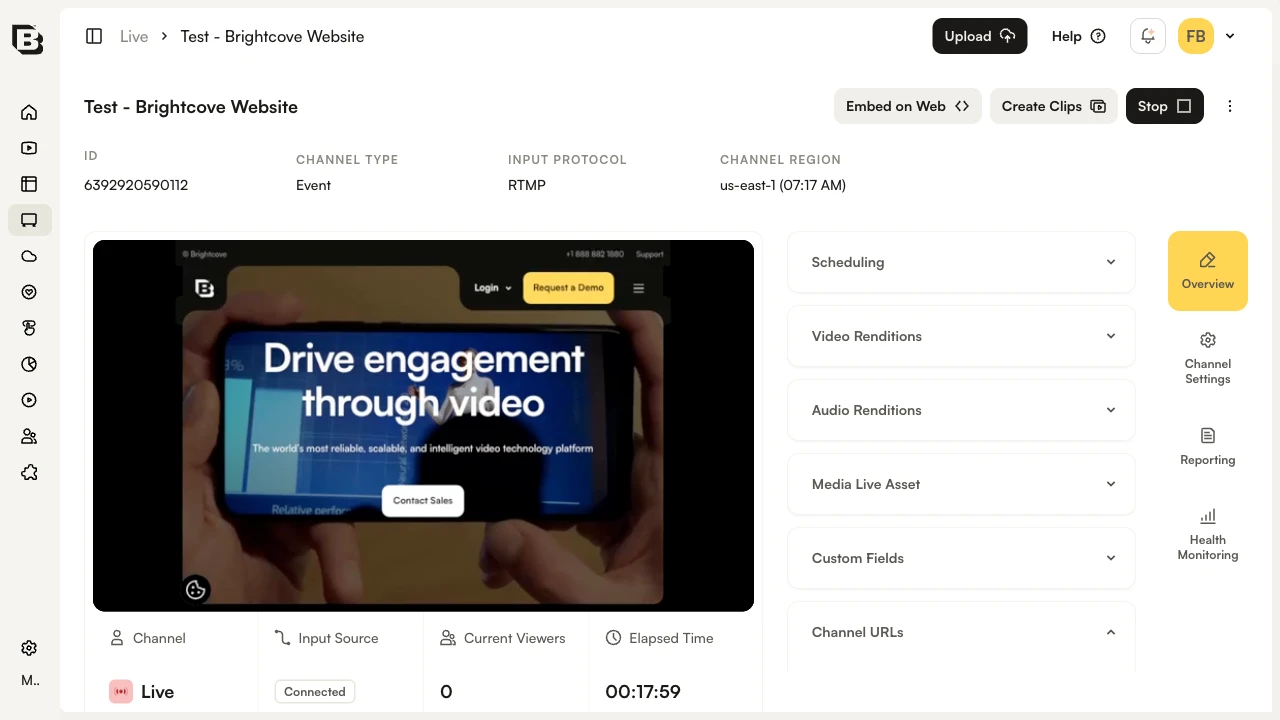
Steps to broadcast a live channel
To stream your live channel using the Live module, you will complete the following tasks:
Creating a new live channel
- Log in to Studio.
- Open the Live module.
- Click the New Channel button to create a new channel.
- Select Event Channel and click Next.
- Enter an Event Channel Name.
- If your account has been configured with required custom fields, make sure the custom fields are assigned values.
- Select a Renditions Profile from the dropdown list. The renditions profile controls the number and quality of live renditions that are created.
- Select the Region closest to your location.
- For Input Transport Protocol, select RTMP.
- Enable Convert media asset from Live to VOD when complete. This will save the channel as a video in the Media module.
- Click Next to proceed through the remaining steps, then click Create.
- The Live module will return a Stream Endpoint. This value will be used in the encoder settings.
Configuring your encoder
In this section, we will configure and use the OBS Studio encoder to support a live streaming channel. OBS Studio software is a desktop application that captures input from your camera and produces a stream that can be delivered by a CDN. Note that there are hardware and other software based encoding solutions available that may be better suited for delivering your live streaming channel. You can download the OBS Studio software here.
- Open OBS Studio.
- In the Sources section, click + to add a new source. Select a Source from the list. This Quick Start is using a camera for video capture so Video Capture Device is selected.
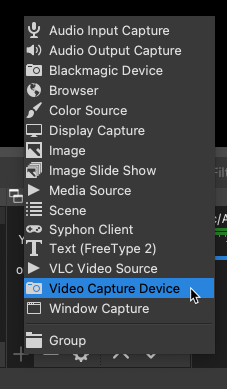
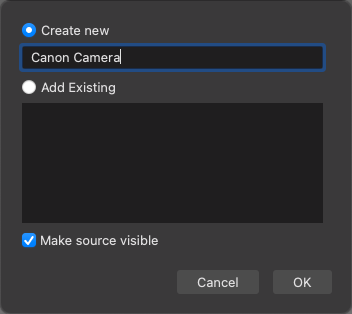
- Enter a name for the new source and click OK.
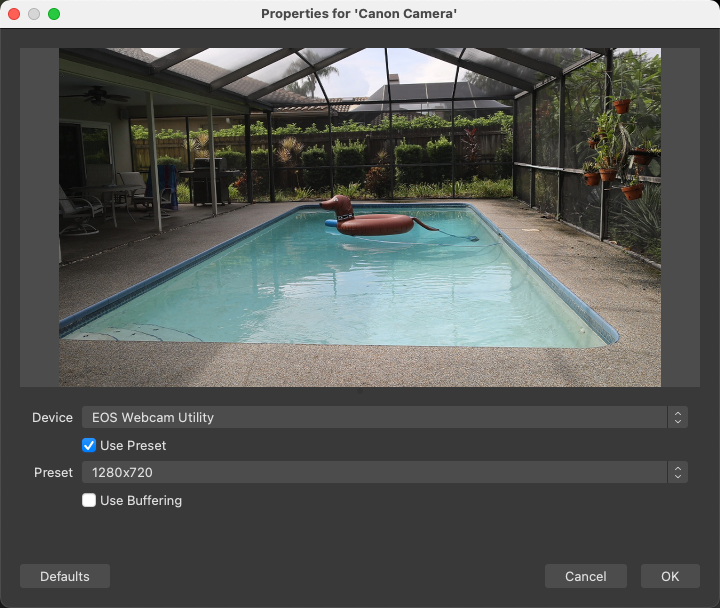
- Select your camera from the Device list. A preview should appear in the properties dialog. Click OK.
- In the Controls section, click Settings.
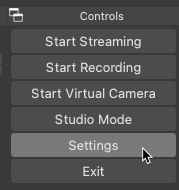
- Click Stream in the left side of the Settings dialog.
- For the Stream Service select Custom....
- For the Server, use the Stream URL provided by the Live module.
- For the Stream Key, use blive.
- Click OK to save the settings.
- In the Controls section, click Start Streaming. The live stream should begin.

Publishing the live channel
To generate the embed code for the live channel, follow these steps:
- Return to the Live module.
- Select your live stream.
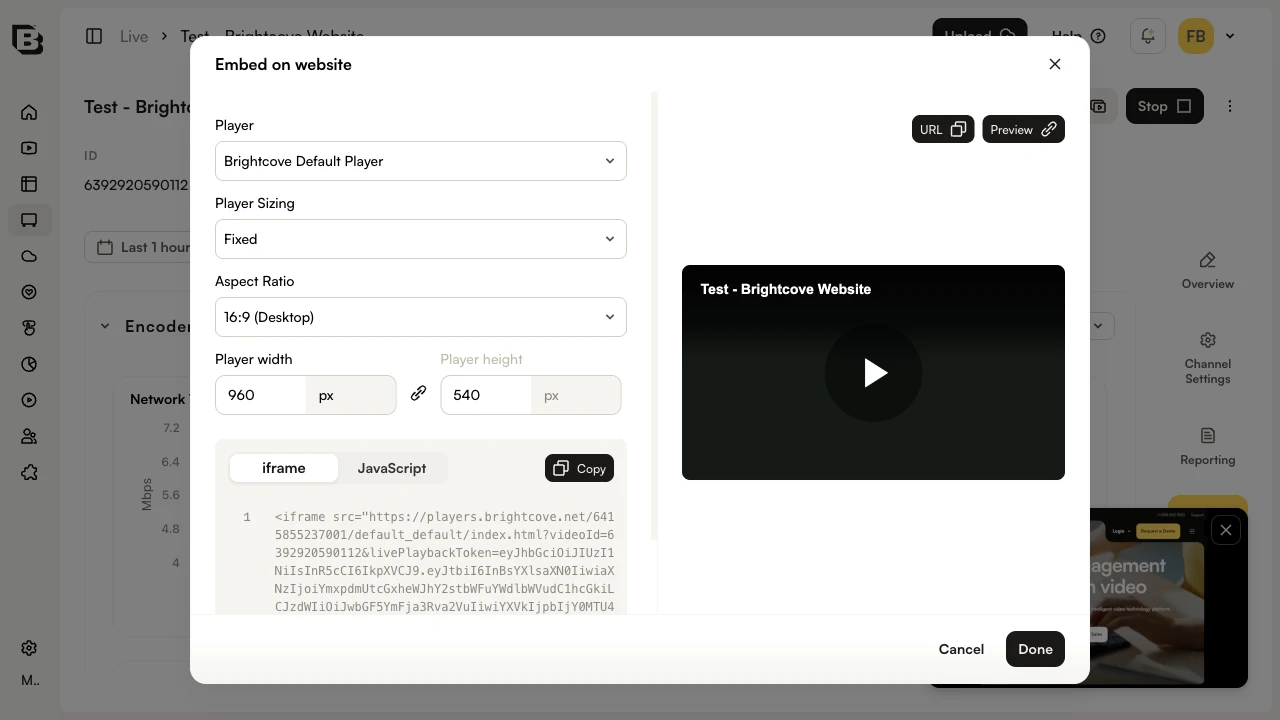
- To publish the live channel, click Embed on Web.

- Select a player using the Player dropdown.
- Click Preview to view the live stream.
- When you are done with the live stream, click the Stop button on the Control Room page. Also, return to OBS Studio and click the Stop Streaming button to stop the encoder from streaming.
Creating a clip
The Live module provides the ability to create video clips from completed channels. Clips can also be created while a live channel is in progress. There are several reasons you might want to create a clip:
- To create a short teaser clip that can be posted to social media.
- To limit the length of a video that you want to post (most platforms limit the length of videos).
- You have found that shorter videos perform better on social media.
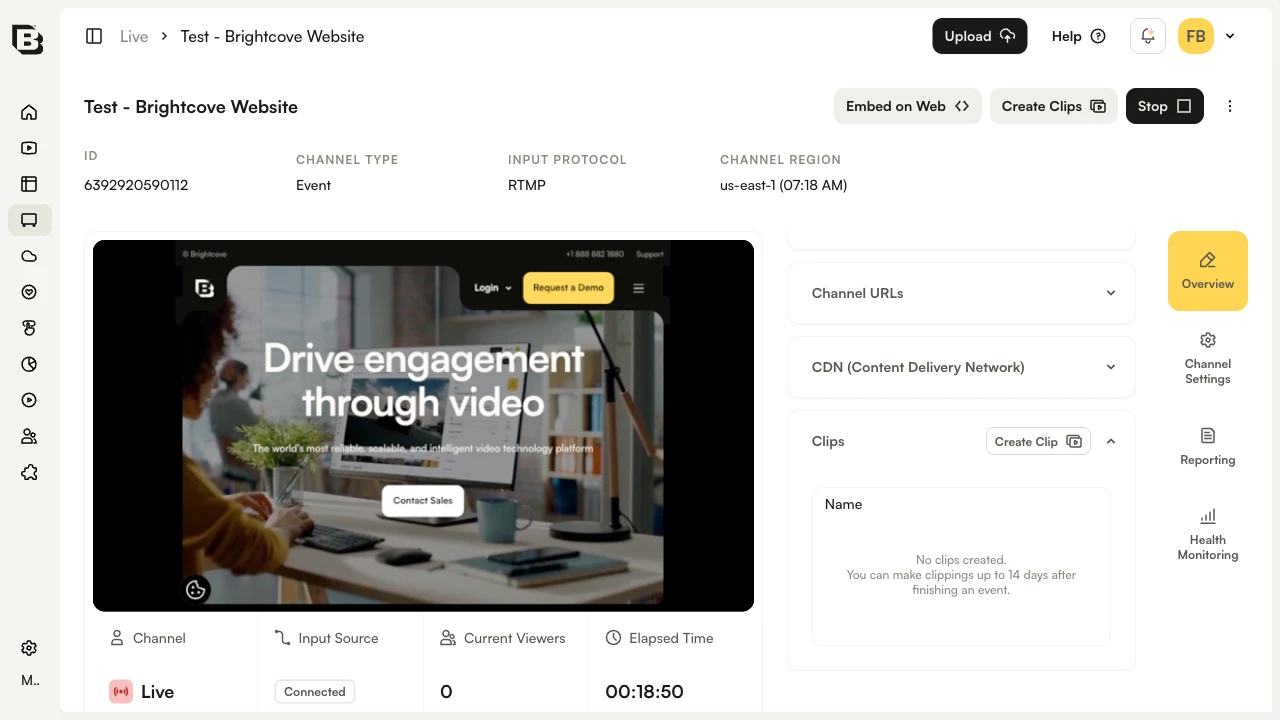
Clips can only be created within 14 days of the channel's end. Afterwards, the Create Clip button will be disabled. If the channel is longer than 24 hours, only the last 24 hours are clippable.
To create a clip, follow these steps:
- Select your Channel.
- Scroll down and click Create Clip
- Click and drag the clipping handles on the focus timeline to set the start and end points for the clip.
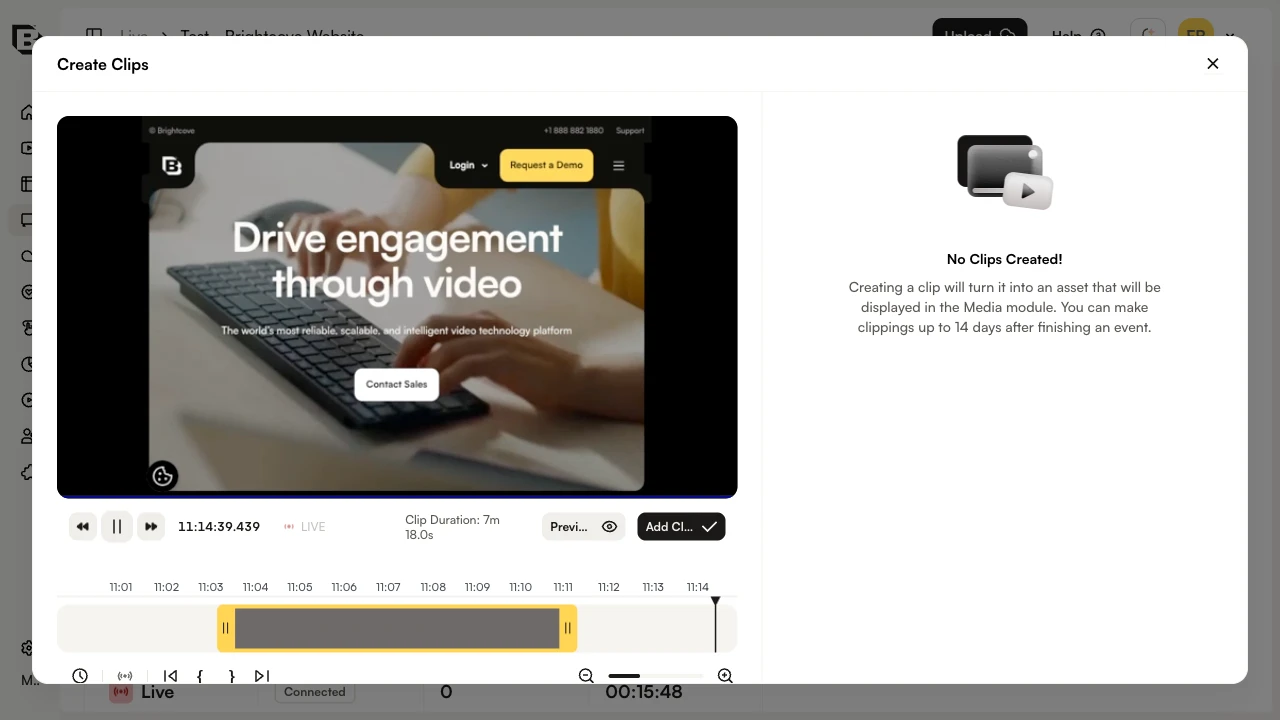
- Click Preview to preview the clip. The start and end points can be adjusted as needed.
- Click Save.
- Click Create Clip. The ingestion process will begin and the clip will be saved to your account.
- Clips will appear below the clip editor. Click Publish to Social to publish the clip to one of your social destinations using Brightcove Social. For information on publishing videos using the Social module, see
Clips will appear in the clips panel on the right side of the clip editor.
Troubleshooting live stream issues
If you need further help getting your live channel to work, you can contact us. To make sure you get the fastest response possible, below is a list of what support will need to solve the problem.
- The specific symptoms the stream is having. For example, does it not play at all, or does it stutter or freeze?
- Whether this stream worked correctly in the past.
- The entry point URL you are using in your encoder.
- The encoding software and hardware you are using.
- The URL to the player to which you have published the live channel.
- The video ID of your live asset.
- The results of a trace route from your encoder to the publishing point host.