Introduction
This feature allows ingesting multiple audio languages, descriptive or ambient audio experience tracks to be available for live playback. You can follow the steps here using Studio. You can also use the Live API. For details, see the Multi Language Audio with the Live API document.
Prerequisites
There are a few prerequisites for multiple language audio tracks.
Enable your account
Contact customer support to enable this feature for your account
Get encoder values
Get the following values from your encoder: For details, refer to your encoder documentation.
- Define the PID (Packet Identifier) for each audio track in your encoder
- Define the Video PID asscociated with the video in your encoder
If you don't know the PID values from your encoder, see the Getting encoder values section.
Adding Audio Tracks
When creating a new Live event or channel:
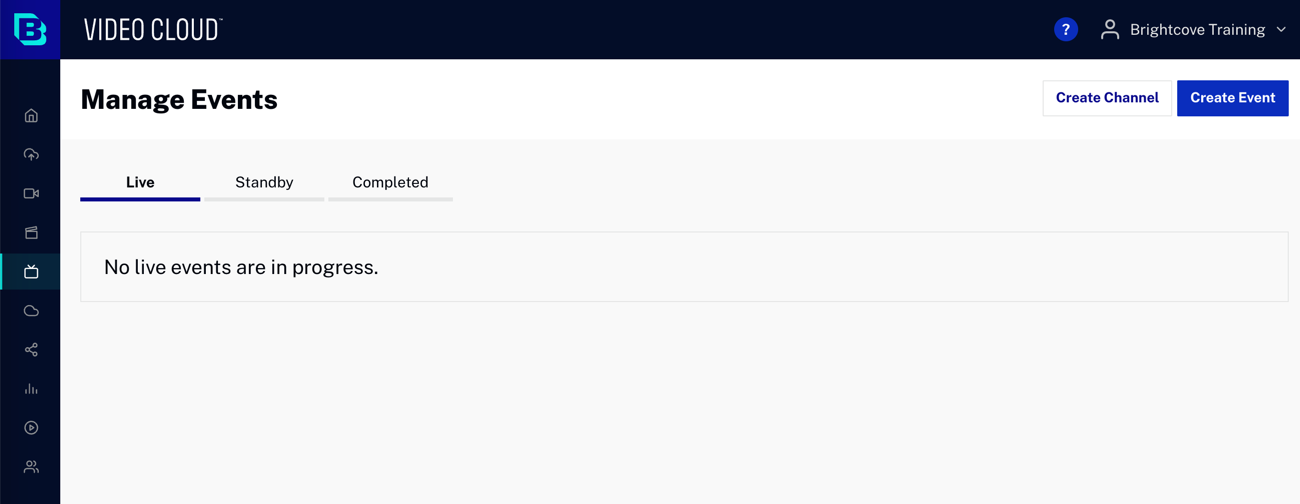
- In Studio, open the Live module.
- Click either Create Channel or Create Event.
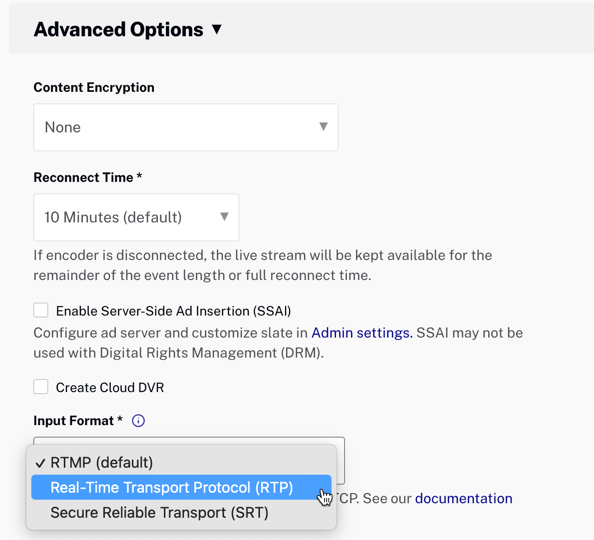
- Expand the Audio Tracks section. You may see that the Add Audio Tracks button is grayed out. This is because multiple audio tracks are only supported for RTP and SRT input formats.

- Expand the Advanced Options section and change the Input Format to either RTP or SRT. Now, the Add Audio Tracks button will be enabled.
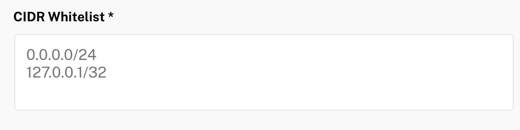
- For CIDR Whitelist, enter either 0.0.0.0/0 to connect to the RTP endpoint to allow all networks, or a specific value. This controls who can connect to the RTP or SRT endpoints.
- For more information about advanced input formats, see the Configuring advanced options document.
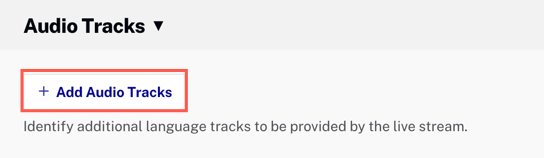
- Click Add Audio Tracks.
- Enter field values for each audio track. Fields with an asterisk (*) are required.
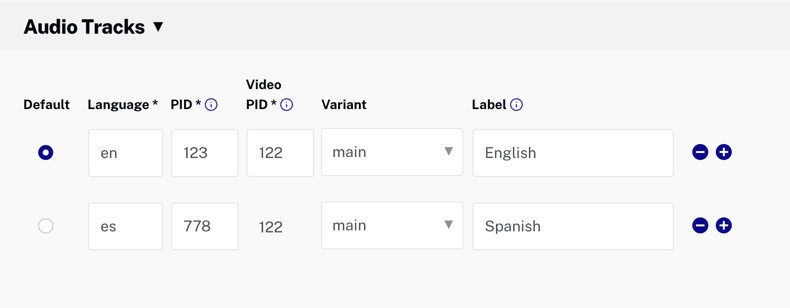
- Default - Select the default audio track
- Language* - The language code for the audio track; Example: en, es, cy-GB, etc.
- PID* - The Packet Identifier (PID) code defined in your encoder to sync audio tracks in your incoming stream to the correct language and variant
- Video PID* - The Packet Identifier (PID) code associated with the video; this value is the same for all audio tracks
- Variant - The variant of the audio track; values are:
- main
- alternate
- caption
- subtitle
- supplementary
- commentary
- dub
- Label - It is highly recommended to enter a label value (example: English, Spanish, etc.); if the label field is blank, the language code will be used as the label
- Click the + and - buttons, to add or remove audio tracks.
- Fill in the rest of the fields for a new channel or event. For details, see the Creating and Managing Live Events document.
- Click either Create Event or Create Channel.
Switching Audio Track
-
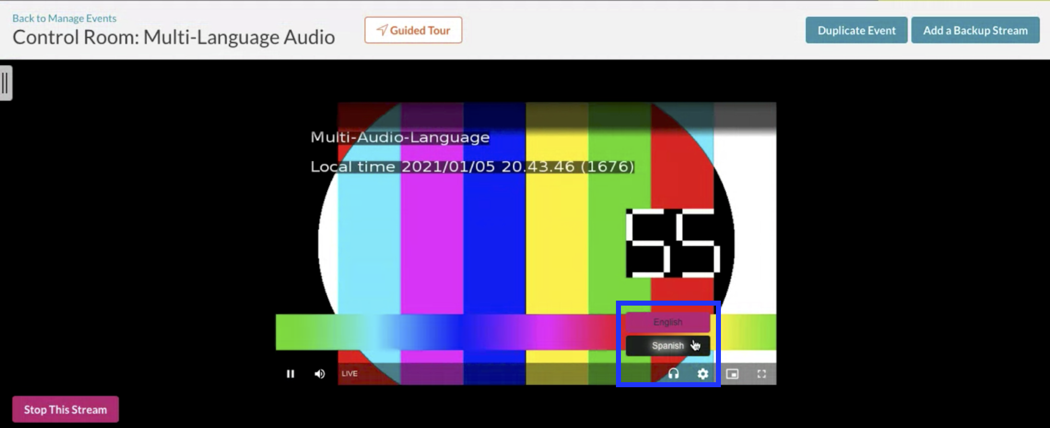
If the multi-audio tracks were set up correctly, the player will have a headphone icon that can be used to switch between tracks.
Getting encoder values
For the following fields, you will provide values from your encoder:
- PID - The packet idenifier from the MPEG-TS that refers to a specific audio track
- Video PID - The packet idenifier from the MPEG-TS input stream to select the video track
If you don't know the PIDs from your encoder, you can use a tool such as ffprobe (included with ffmpeg) to inspect the PIDs in the stream. For details, see the Multi Language Audio with the Live API document.
Viewing live event info
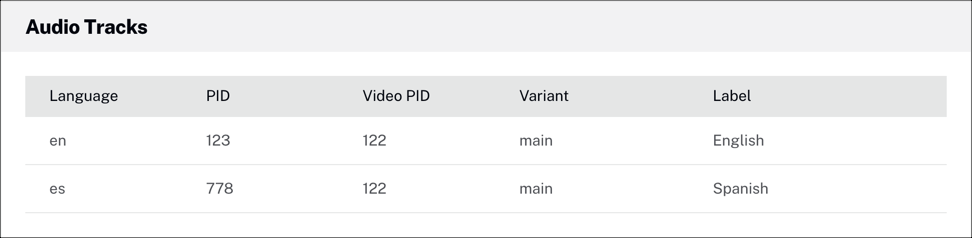
Once you have created your live event, you will see event information in the control room, including your audio tracks.
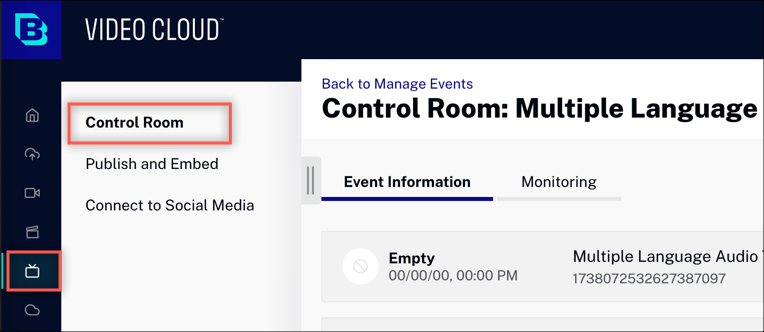
- Return to Studio.
- In the left navigation, click Live. Then, select Control Room. Here, you will find detailed information about your live event.
- Scroll down to find the Audio Tracks section. This information include Program ID (PID) and Video Program ID (Video PID).
Using the Live API
You can also use the Live API to manage multiple language audio tracks with your live streams.
Limitations
- Live jobs utilizing SSAI or Redundancy Groups cannot currently support multi-language audio.
This limitation applies to both the job-level and player-level settings. - If you are using Live-to-VOD, the VOD assets will not have multiple audio tracks
- Creating clips from multi-audio live events is not supported at this time
- It is not possible to create DRM live jobs with multi-language audio tracks from Live Module UI. This is only available via the Live API
- RTMP outputs created from SEPs will contain only video and no audio when selecting a transcoded output profile. A workaround would be to use a transmuxed output rather than a transcoded output by selecting the Source rendition in the Live Module in Studio or omitting the
output_labelin the API call when creating an RTMP output. This provides both video and audio. - Audio tracks can only be defined for a new live job. Currently, it is not possible to update the audio tracks for existing live events.